开始之前
更多内容,可以看我的文档:.NET 学习之路-数据的持久化
正文开始
前面只是一个最简单的基础使用方案,虽然已经实现了认证与授权,但是明显并不能满足生产需求,下面就按不同需求进行配置。
上面的例子中,所有数据都在内存中,并不能持久化。如果要数据持久化,上数据库是必然的。
创建使用数据库的项目
-
通过命令可以快速创建一个带有模板的项目:
dotnet new is4ef -
下载 示例代码 可以获取完整的配置内容。
-
也可以创建空项目后按照下面内容自行配置。
配置数据库服务
使用上面命令创建的项目会包含比较完整的内容,下面对项目稍作修改。
添加数据库相关依赖
IdentityServer4.AspNetIdentity(4.1.2)
IdentityServer4.EntityFramework(4.0.0)
Microsoft.EntityFrameworkCore.Tools(3.1.5)
Microsoft.AspNetCore.Identity.EntityFrameworkCore(3.1.5)
Pomelo.EntityFrameworkCore.MySql(3.1.1)注意:截至 2021.3.20,Pomelo.EntityFrameworkCore.MySql 不支持 Net5(想尝鲜可以使用 alpha-5 版本),项目是 net core 3.1 的,对应的 Pomelo.EntityFrameworkCore.MySql 使用的是 3.1.1 版本,对应的 Microsoft.EntityFrameworkCore.Tools 也应该是 3.x 版本。
本配置为 MySQL,如果使用其他数据库,请自行下载。
添加数据库连接字符串
在 appsettings.json 中添加如下内容:
{
  "ConnectionStrings": {
    // 使用命令创建的项目自带默认字符串,连接 SQLite 的
    "DefaultConnection": "Data Source=IdentityServer.db;",
    // 添加 MySQL 的连接字符串
    "MySQL": "server=192.168.1.126;userid=jeremyjone;pwd=123456;port=3306;database=ids-test"
  }
}
注册数据库的相关服务
在 Startup.cs 的配置服务中添加如下内容:
添加数据库上下文
var connectionMySql = Configuration["ConnectionStrings:MySQL"];
if (string.IsNullOrWhiteSpace(connectionMySql))
{
    throw new Exception("数据库配置异常,请检查 appsettings.json");
}

services.AddDbContext<ApplicationDbContext>(options => options.UseMySql(connectionMySql));
配置身份参数
services.AddIdentity<ApplicationUser, ApplicationRole>()
    // 添加实体库
    .AddEntityFrameworkStores<ApplicationDbContext>()
    .AddDefaultTokenProviders();
配置 IS4 为数据库模式
空项目不需要添加被注释掉的内容。如果使用命令创建的项目,会默认使用 SQLite 进行配置,按中文注释稍作修改即可。
var migrationsAssembly = typeof(Startup).GetTypeInfo().Assembly.GetName().Name;
var builder = services.AddIdentityServer(options =>
    {
        options.Events.RaiseErrorEvents = true;
        options.Events.RaiseInformationEvents = true;
        options.Events.RaiseFailureEvents = true;
        options.Events.RaiseSuccessEvents = true;

        // see https://identityserver4.readthedocs.io/en/latest/topics/resources.html
        options.EmitStaticAudienceClaim = true;
    })
    // 注释掉测试用户,使用数据库的内容
    //.AddTestUsers(TestUsers.Users)
    // 配置 IS4 使用哪种用户模型
    .AddAspNetIdentity<ApplicationUser>()
    // this adds the config data from DB (clients, resources, CORS)
    .AddConfigurationStore(options =>
    {
        //options.ConfigureDbContext = builder => builder.UseSqlite(connectionString);
        // 使用 MySQL
        options.ConfigureDbContext = b =>
            b.UseMySql(connectionMySQL, sql => sql.MigrationsAssembly(migrationsAssembly));
    })
    // this adds the operational data from DB (codes, tokens, consents)
    .AddOperationalStore(options =>
    {
        //options.ConfigureDbContext = builder => builder.UseSqlite(connectionString);
        // 使用 MySQL
        options.ConfigureDbContext = b =>
            b.UseMySql(connectionMySQL, sql => sql.MigrationsAssembly(migrationsAssembly));

        // this enables automatic token cleanup. this is optional.
        options.EnableTokenCleanup = true;
    });

// not recommended for production - you need to store your key material somewhere secure
builder.AddDeveloperSigningCredential();
不要忘记在中间件注册使用 IS4
app.UseRouting();

// 注册使用 IS4 服务。它需要在 *路由* 之后,*授权* 之前。
app.UseIdentityServer();

app.UseAuthorization();
创建数据模型
上面配置了自定义的 ApplicationDbContext 和 ApplicationUser,因为通常用户的内容我们需要自定义,如果完全不用自定义的话,那么直接使用原型(IdentityUser)即可。
在项目根目录下新建一个 Models 文件夹并创建下面几个模型类:
创建自定义用户模型
// ApplicationUser.cs

public class ApplicationUser : IdentityUser<int>
{
    /// <summary>
    /// 有效
    /// </summary>
    public bool Validity { get; set; } = true;

    /// <summary>
    /// 昵称
    /// </summary>
    public string NickName { get; set; }

    /// <summary>
    /// 出生日期
    /// </summary>
    public DateTime BirthDate { get; set; }

    public ICollection<ApplicationUserRole> UserRoles { get; set; }
}
创建自定义角色模型
// ApplicationRole.cs

public class ApplicationRole: IdentityRole<int>
{
    /// <summary>
    /// 有效
    /// </summary>
    public bool Validity { get; set; } = true;

    /// <summary>
    /// 启用
    /// </summary>
    public bool Enabled { get; set; } = true;

    /// <summary>
    /// 描述
    /// </summary>
    public string Description { get; set; }

    public ICollection<ApplicationUserRole> UserRoles { get; set; }
}
创建用户角色模型
将用户和角色进行关联
// ApplicationUserRole.cs

public class ApplicationUserRole: IdentityUserRole<int>
{
    public virtual ApplicationUser User { get; set; }
    public virtual ApplicationRole Role { get; set; }
}
创建自定义数据库上下文
// ApplicationDbContext.cs

public class ApplicationDbContext : IdentityDbContext<ApplicationUser, ApplicationRole, int, IdentityUserClaim<int>, ApplicationUserRole, IdentityUserLogin<int>, IdentityRoleClaim<int>, IdentityUserToken<int>>
{
    public ApplicationDbContext(DbContextOptions<ApplicationDbContext> options) : base(options)
    {

    }

    protected override void OnModelCreating(ModelBuilder builder)
    {
        base.OnModelCreating(builder);
    }
}
这样就做好了数据模型,下面可以根据模型创建数据库
创建种子数据
创建配置资源与客户端
使用命令创建的项目,在根目录下已经存在一个 Config.cs 的文件。如果没有,则创建该文件并添加如下内容即可:
public static class Config
{
    public static IEnumerable<IdentityResource> IdentityResources =>
                new IdentityResource[]
                {
            new IdentityResources.OpenId(),
            new IdentityResources.Profile(),
                };

    public static IEnumerable<ApiScope> ApiScopes =>
        new ApiScope[]
        {
            new ApiScope("scope1"),
            new ApiScope("scope2"),
        };

    public static IEnumerable<Client> Clients =>
        new Client[]
        {
            // m2m client credentials flow client
            new Client
            {
                ClientId = "m2m.client",
                ClientName = "Client Credentials Client",

                AllowedGrantTypes = GrantTypes.ClientCredentials,
                ClientSecrets = { new Secret("511536EF-F270-4058-80CA-1C89C192F69A".Sha256()) },

                AllowedScopes = { "scope1" }
            },

            // interactive client using code flow + pkce
            new Client
            {
                ClientId = "interactive",
                ClientSecrets = { new Secret("49C1A7E1-0C79-4A89-A3D6-A37998FB86B0".Sha256()) },

                AllowedGrantTypes = GrantTypes.Code,

                RedirectUris = { "https://localhost:44300/signin-oidc" },
                FrontChannelLogoutUri = "https://localhost:44300/signout-oidc",
                PostLogoutRedirectUris = { "https://localhost:44300/signout-callback-oidc" },

                AllowOfflineAccess = true,
                AllowedScopes = { "openid", "profile", "scope2" }
            },
        };
}
其中内容都是基础配置,不再赘述。
创建种子用户与角色
还是在 Config.cs 文件中即可:
public static IEnumerable<ApplicationUser> Users =>
    new[]
    {
        new ApplicationUser
        {
            BirthDate = DateTime.Now,
            Email = "user1@qq.com",
            UserName = "user1",
            NickName = "用户1",
            EmailConfirmed = true
        },
        new ApplicationUser
        {
            BirthDate = DateTime.Now,
            Email = "user2@qq.com",
            UserName = "user2",
            NickName = "用户2",
            EmailConfirmed = true
        },
    };

public static IEnumerable<ApplicationRole> Roles =>
    new[]
    {
        new ApplicationRole
        {
            Name = "admin",
            Description = "管理员",
        },
        new ApplicationRole
        {
            Name = "user",
            Description = "用户",
        },
        new ApplicationRole
        {
            Name = "guest",
            Description = "访客",
        },
    };
创建种子数据的生成操作
使用命令创建的项目,在根目录下有一个 SeedData.cs 的文件,修改为如下内容。如果没有,则创建并将下面内容粘贴到文件中:
public class SeedData
{
    public static void EnsureSeedData(IServiceProvider serviceProvider)
    {
        // var services = new ServiceCollection();

        // 不需要 SQLite
        //services.AddOperationalDbContext(options =>
        //{
        //    options.ConfigureDbContext = db => db.UseSqlite(connectionString, sql => sql.MigrationsAssembly(typeof(SeedData).Assembly.FullName));
        //});
        //services.AddConfigurationDbContext(options =>
        //{
        //    //options.ConfigureDbContext = db => db.UseMySql(connectionString, sql => sql.MigrationsAssembly(typeof(SeedData).Assembly.FullName));
        //});

        // 不使用模板提供的 serviceProvider,通过 host 直接传递 ServiceProvider
        // var serviceProvider = services.BuildServiceProvider();
        using (var scope = serviceProvider.GetRequiredService<IServiceScopeFactory>().CreateScope())
        {
            scope.ServiceProvider.GetService<PersistedGrantDbContext>().Database.Migrate();

            var context = scope.ServiceProvider.GetService<ConfigurationDbContext>();
            context.Database.Migrate();
            EnsureSeedData(context);

            #region 添加用户数据

            var ctx = scope.ServiceProvider.GetService<ApplicationDbContext>();
            ctx.Database.Migrate();
            EnsureSeedData(scope);

            #endregion
        }
    }

    #region 命令创建的函数,无修改

    private static void EnsureSeedData(ConfigurationDbContext context)
    {
        if (!context.Clients.Any())
        {
            Log.Debug("Clients being populated");
            foreach (var client in Config.Clients.ToList())
            {
                context.Clients.Add(client.ToEntity());
            }
            context.SaveChanges();
        }
        else
        {
            Log.Debug("Clients already populated");
        }

        if (!context.IdentityResources.Any())
        {
            Log.Debug("IdentityResources being populated");
            foreach (var resource in Config.IdentityResources.ToList())
            {
                context.IdentityResources.Add(resource.ToEntity());
            }
            context.SaveChanges();
        }
        else
        {
            Log.Debug("IdentityResources already populated");
        }

        if (!context.ApiResources.Any())
        {
            Log.Debug("ApiScopes being populated");
            foreach (var resource in Config.ApiScopes.ToList())
            {
                context.ApiScopes.Add(resource.ToEntity());
            }
            context.SaveChanges();
        }
        else
        {
            Log.Debug("ApiScopes already populated");
        }
    }

    #endregion

    #region 创建用户和角色

    private static void EnsureSeedData(IServiceScope scope)
    {
        var userManager = scope.ServiceProvider.GetRequiredService<UserManager<ApplicationUser>>();
        var roleManager = scope.ServiceProvider.GetRequiredService<RoleManager<ApplicationRole>>();

        // 创建角色
        foreach (var role in Config.Roles)
        {
            var res = roleManager.CreateAsync(role).Result;
            if (!res.Succeeded)
            {
                throw new Exception(res.Errors.First().Description);
            }
            Console.WriteLine($"{role.Name} created!");
        }

        // 创建用户
        foreach (var user in Config.Users)
        {
            // 默认密码为 Test23
            var res = userManager.CreateAsync(user, "Test_123").Result;
            if (!res.Succeeded)
            {
                throw new Exception(res.Errors.First().Description);
            }

            // 创建用户的声明
            var claims = new List<Claim>
            {
                new Claim(JwtClaimTypes.Name, user.NickName),
                new Claim(JwtClaimTypes.Email, user.Email)
            };

            res = userManager.AddClaimsAsync(user, claims).Result;
            if (!res.Succeeded)
            {
                throw new Exception(res.Errors.First().Description);
            }

            // 创建用户的角色
            var role = user.UserName == "user1" ? "admin" : "user";
            res = userManager.AddToRoleAsync(user, role).Result;
            if (!res.Succeeded)
            {
                throw new Exception(res.Errors.First().Description);
            }

            Console.WriteLine($"{user.NickName} created!");
        }
    }

    #endregion
}
将数据写入数据库
下面就可以将前面费了好大劲写的种子数据写入到数据库了。
在添加数据之前需要创建数据库
但是我们不要急于写入数据,现在还没有数据库。一切已经准备就绪,我们只需要通过几行命令就可以轻松创建数据库。
在 vs 的控制台直接执行命令是最简单的方式,依次执行:
PM> add-migration InitialIdentityServerPersistedGrantDbMigrationMysql -c PersistedGrantDbContext -o MigrationsMySql/PersistedGrantDb
Build started...
Build succeeded.
To undo this action, use Remove-Migration.
PM> update-database -context PersistedGrantDbContext
Build started...
Build succeeded.
Done.
PM> add-migration InitialIdentityServerConfigurationDbMigrationMysql -c ConfigurationDbContext -o MigrationsMySql/ConfigurationDb
Build started...
Build succeeded.
To undo this action, use Remove-Migration.
PM> update-database -context ConfigurationDbContext
Build started...
Build succeeded.
Done.
PM> add-migration AppDbMigration -c ApplicationDbContext -o MigrationsMySql
Build started...
Build succeeded.
To undo this action, use Remove-Migration.
PM> update-database -context ApplicationDbContext
Build started...
Build succeeded.
Done.
因为可能版本不一致,旧版的
update-database的-c是没有问题的,但新版由于新增了参数,会报冲突,使用全称即可。
下同,但全称是--context。
也可以通过 dotnet 命令执行,需要先安装 Entity Framework Core CLI,并在项目中安装 Microsoft.EntityFrameworkCore.Design:
dotnet tool install --global dotnet-ef
dotnet add package Microsoft.EntityFrameworkCore.Design
然后依次执行下面命令:
dotnet ef migrations add InitialIdentityServerPersistedGrantDbMigrationMysql -c PersistedGrantDbContext -o MigrationsMySql/PersistedGrantDb
dotnet ef database update -c PersistedGrantDbContext
dotnet ef migrations add InitialIdentityServerConfigurationDbMigrationMysql -c ConfigurationDbContext -o MigrationsMySql/ConfigurationDb
dotnet ef database update -c ConfigurationDbContext
dotnet ef migrations add AppDbMigration -c ApplicationDbContext -o MigrationsMySql
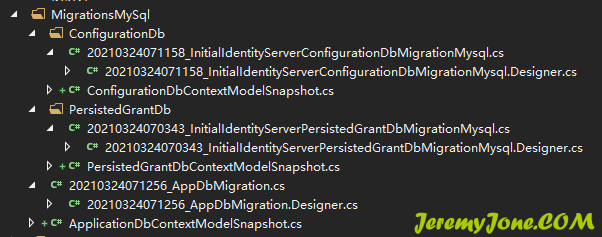
dotnet ef database update -c ApplicationDbContext运行之后,可以看到在项目中多了一个 MigrationsMySql 的文件夹,里面有很多自动生成的文件:
同时,在数据库中可以看到已经生成了对应的表:
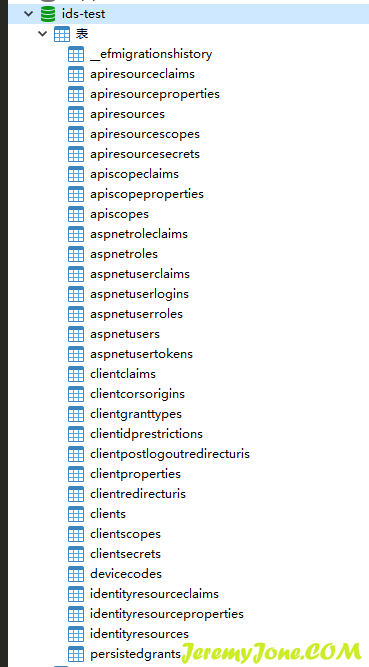
生成的文件为模型文件,如果没有修改我们的自定义实体模型,可以一直使用,只需要执行 update 命令即可创建数据库。如果修改了模型结构,将整个文件夹删掉重新生成,并执行全部命令即可。
将写好的数据通过命令添加到数据库
通过命令创建的项目中,已经贴心的为我们添加好了添加数据的命令,甚至在我们刚刚创建好的时候就会询问我们是否需要执行它。如果我们一开始就运行了,那么在项目根目录下回生成一个 IdentityServer.db 数据库文件,它是 SQLite 格式的。因为我们现在使用 MySQL,所以需要重新跑一遍。
空项目自行配置的也没关系,可以将下面代码粘贴到 Program.cs 文件中:
public static int Main(string[] args)
{
    var seed = args.Contains("/seed");
    if (seed)
    {
        args = args.Except(new[] { "/seed" }).ToArray();
    }

    var host = CreateHostBuilder(args).Build();

    if (seed)
    {
        Log.Information("Seeding database...");
        SeedData.EnsureSeedData(host.Services);
        Log.Information("Done seeding database.");
        return 0;
    }

    Log.Information("Starting host...");
    host.Run();
    return 0;
}
这样,我们通过命令行启动项目,并且输入 /seed 参数的时候,它就会执行前面写的内容将种子数据添加到数据库中。
可以通过命令行运行项目:
dotnet run /seed同时,也可以在 vs 中添加参数执行,不要忘记执行之后删除就行,项目属性添加即可:
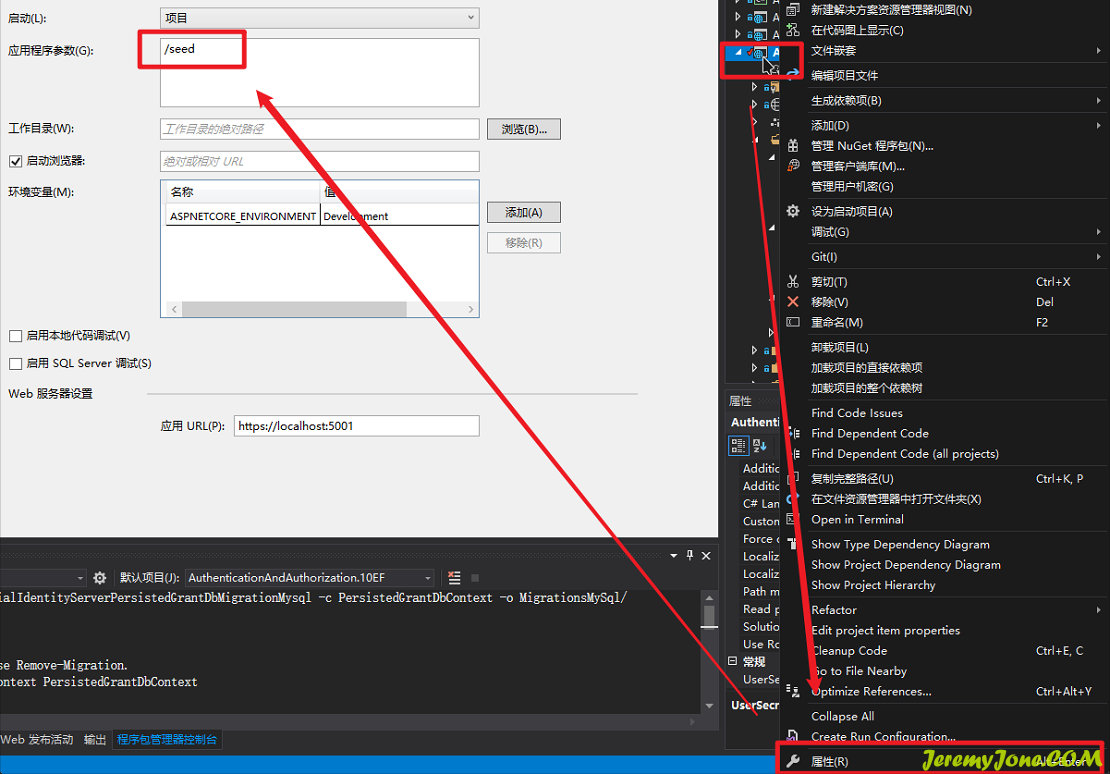
运行项目,在控台看到如下信息则表示已经成功:
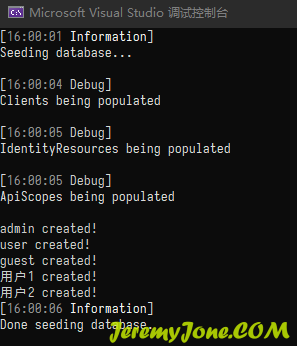
同时在数据库可以看到数据已经写入:

使用数据库的数据
删掉项目属性中的 /seed 参数,或者直接命令行启动项目,使用我们创建的用户登录:
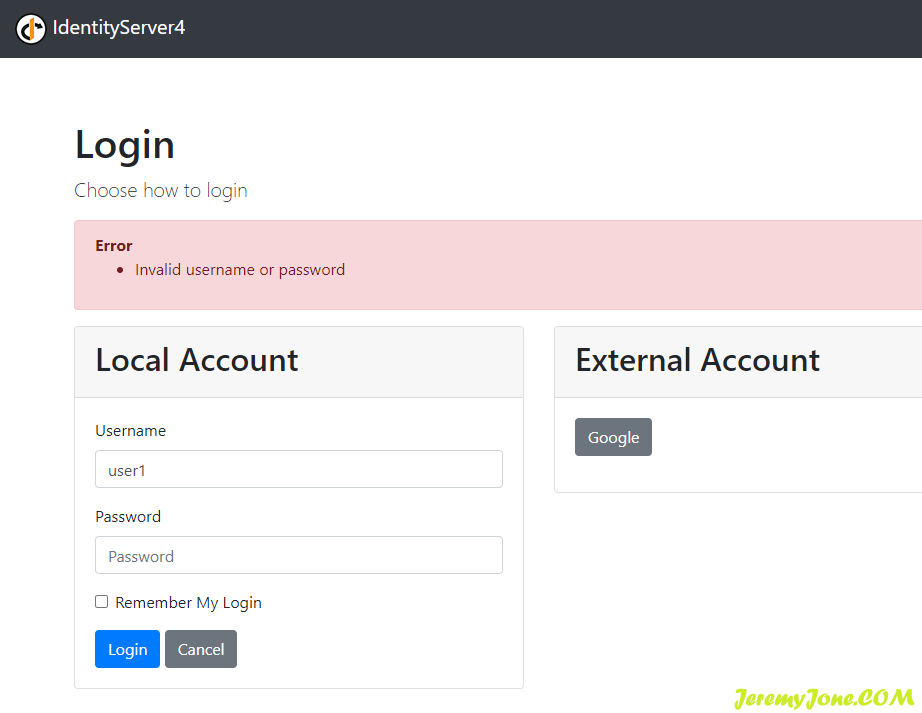
发现并不能成功登录。不要灰心,因为我们还没有修改控制器的内容。
让控制器可以调用数据库
找到 Quickstart/Account/AccountController.cs 文件,在构造器中可以发现它目前使用的用户仍然是测试账户信息,修改构造器的内容:
public AccountController(IIdentityServerInteractionService interaction,
    IClientStore clientStore,
    IAuthenticationSchemeProvider schemeProvider,
    IEventService events,
    UserManager<ApplicationUser> userManager,
    SignInManager<ApplicationUser> signInManager)
{
    //_users = users ?? new TestUserStore(TestUsers.Users);

    _interaction = interaction;
    _clientStore = clientStore;
    _schemeProvider = schemeProvider;
    _events = events;
    // 添加用户管理器
    _userManager = userManager;
    // 添加登录管理器
    _signInManager = signInManager;
}
并生成只读的 _userManager 和 _signInManager:
private readonly UserManager<ApplicationUser> _userManager;
private readonly SignInManager<ApplicationUser> _signInManager;
修改登录方式
找到登录函数:
[HttpPost]
[ValidateAntiForgeryToken]
public async Task<IActionResult> Login(LoginInputModel model, string button)
{
    // ...

    if (ModelState.IsValid)
    {
        // ... 登录验证部分
    }

    // ...
}
找到其中的登录验证部分,并完全将其替换为如下内容:
if (ModelState.IsValid)
{
    // 允许用户使用用户名
    var user = await _userManager.FindByNameAsync(model.Username);

    if (user != null && user.Validity)
    {
        // 使用密码验证
        var result = await _signInManager.PasswordSignInAsync(user.UserName, model.Password, model.RememberLogin, lockoutOnFailure: true);
        if (result.Succeeded)
        {
            // TODO 更新登录信息

            await _events.RaiseAsync(new UserLoginSuccessEvent(user.UserName, user.Id.ToString(), user.UserName));

            // make sure the returnUrl is still valid, and if so redirect back to authorize endpoint or a local page
            // the IsLocalUrl check is only necessary if you want to support additional local pages, otherwise IsValidReturnUrl is more strict
            if (_interaction.IsValidReturnUrl(model.ReturnUrl) || Url.IsLocalUrl(model.ReturnUrl))
            {
                return Redirect(model.ReturnUrl);
            }
            return Redirect("~/");
        }
    }
    await _events.RaiseAsync(new UserLoginFailureEvent(model.Username, "invalid credentials"));
    ModelState.AddModelError(string.Empty, AccountOptions.InvalidCredentialsErrorMessage);
}
修改登出方式
找到登出函数,并进行修改:
[HttpPost]
[ValidateAntiForgeryToken]
public async Task<IActionResult> Logout(LogoutInputModel model)
{
    // ...

    if (User?.Identity.IsAuthenticated == true)
    {
        // delete local authentication cookie
        //await HttpContext.SignOutAsync();

        // 注释掉上面的模板登出,改为下面的通过管理器登出的方式
        await _signInManager.SignOutAsync();

        // raise the logout event
        await _events.RaiseAsync(new UserLogoutSuccessEvent(User.GetSubjectId(), User.GetDisplayName()));
    }

    // ...
}
完成
现在重新运行项目,通过创建的用户登录,发现已经可以正常登录。
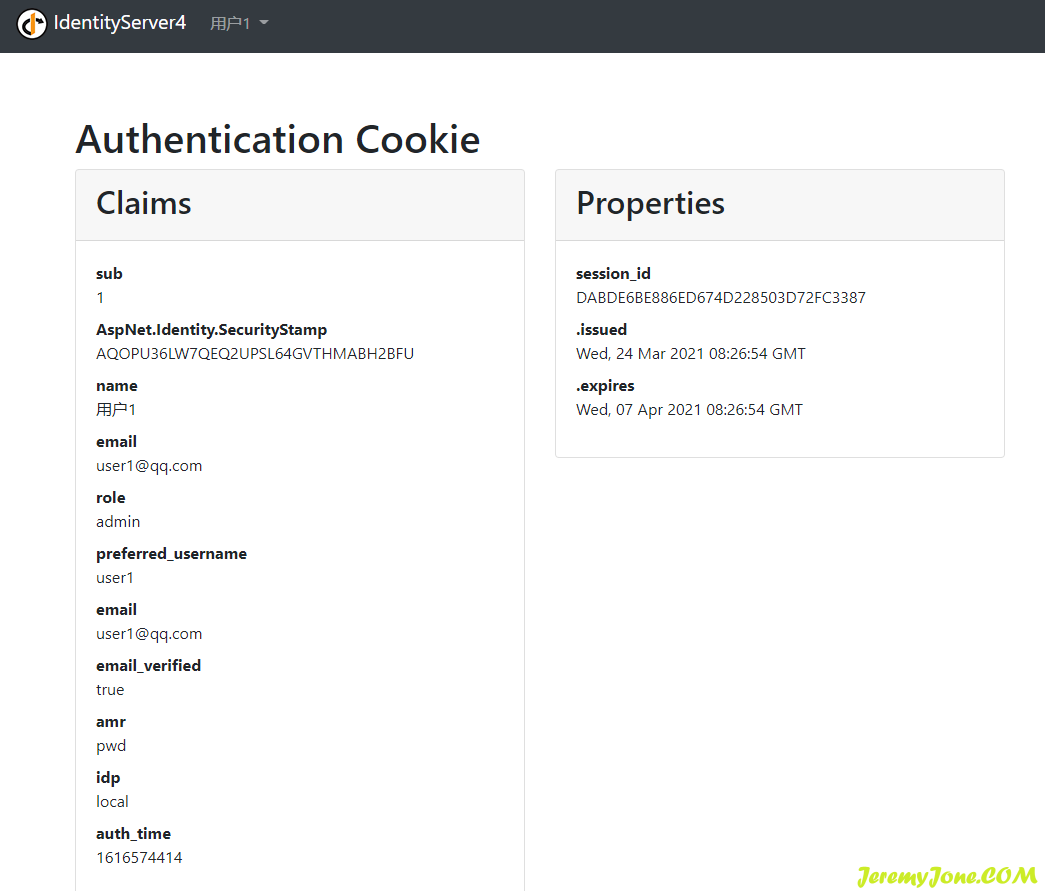
至此,整个项目已经完整的使用了数据库,后面可以围绕数据库的数据进行任何操作。
说明
上文中出现 Log 对象,可以参考 SeriLog 的使用

文章评论
您好,请问如何与您联系,我有一些认证授权上的问题想不明白,想与您请教一下,请问是否方便?如果可以的话,希望收到您的回复,谢谢。
@岁城 您可以给我发邮件,jeremyjone@.qq.com。非常感谢您的支持
An unhandled exception occurred while processing the request.
MissingMethodException: Method not found: 'Boolean Microsoft.EntityFrameworkCore.Migrations.IMigrationsModelDiffer.HasDifferences(Microsoft.EntityFrameworkCore.Metadata.IModel, Microsoft.EntityFrameworkCore.Metadata.IModel)'.
Microsoft.AspNetCore.Diagnostics.EntityFrameworkCore.DatabaseErrorPageMiddleware.Invoke(HttpContext httpContext)
请问一下这个错误是为什么?
@程 删除 app.UseDatabaseErrorPage() 然后重启
好了,谢谢